picture

picture

Sunday, December 18, 2011

Tole Mour


Apparently my theory was correct. If you really want to learn about all things boaty, you have to go hang out where boats live.

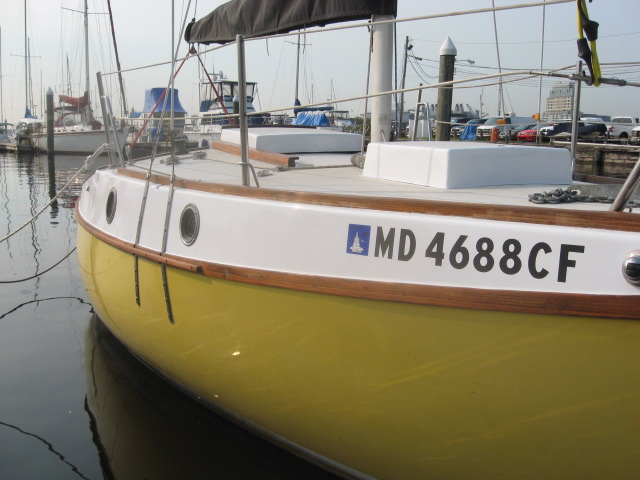
on Saturday, I helped Cap'n Wayne-o and gang loft two sails for this ship at the Rec Center in Port Townsend. See the jib sail out front on the bowsprit where the black speck is standing? in the photo above? (Yep, that's a person.) We laid out and cut the inner and outer jib. The two sails laid out took up the whole basket ball court. I was supposed to be picking up redlines, but i figured an opportunity like this was too much to pass up.


cipher'n and Ponder'n 

Cap'n Wayne'o explained the current state of sail making affairs to me, and it was very enlightening. Most sails are computer generated and cut on the fabric industry equivalent of a CNC machine. They are then shipped to a sail maker who stitches them together, makes all the tabling and patches,(reinforcement at the edges and corners,)and then completes all the hand work like boltropes, grommets, slides, etc. Unfortunately, when owners of traditional boats buy new sails, they try to optimize performance through purchasing new CNC sails made of high tech fabrics with modern panel layouts. They often fail to realize that the boat and the rig are two components of the same system, and that if the hull shape is not optimized as well, the gains in rig efficiency are lost in the total equation. Why put a Porsche engine in a chevy astro? It ain't gonna work. Now they have a classic B.B. Crowninshield stay'sl schooner with one crunchy new Dacron radial cut main, and a traditionally cut fore'sl. It looks stupid, and might go a negligible bit faster.


Chalk line layout

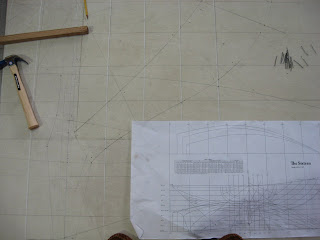
The sails are marked on the floor with a standard carpenter's chalk line and chalkboard chalk.


Cap'n Wayne-o rolls out and tapes down the first panel. He is preparing to mark the curve in the leech of the sail. (The aft trailing edge). We used a 100' tape stretched out an then carefully tugged it into position to get the curve. We then sighted down the curve to fair it, much like in lofting a boat. In a traditional sail loft, the fabric would be pinned to the floor, but here we had to use tape. Duct tape, no less. I felt perfectly at home.


This is as far as i got. I gave myself until noon, and then i went back to the Hole to finish my drawings. They will lay out all the sails, mark where they all match at the seams, (much like the little notches you see in clothing patterns,) fold the panels carefully in a specific order, and then take them to the sail loft at the commune to stitch. Strangely enough, they will never see it laid out again until it is flying on the Tole Mour.

I'll have to go to California some day and see how my first professional sail turned out. Pretty big step up from my bed sheet sail i cut for the Eel, my 7' dinghy. Turns out though, i actually had the concept right. I was pleased to discover this.


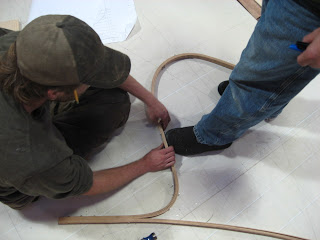
As you can see, i actually laid out and cut panels, (while Commander Wiggleberry walked all over my sail sniffing every seam). My leech curve is floppy, and my mast is, yet again, too stubby, but I'm pretty sure my biggest mistake was not holding out for Star Wars sheets from Goodwill.


Wednesday, December 14, 2011

Japanese Waterbox Joint

What do you get when a 4 thousand year old Japanese Joinery technique crosses good old Tennessee "get-r-dun" ingenuity? A low rent tool for making waterbox joints.


The waterbox joint is a self caulking joint that relies on the presence of water to swell the grain of a plank of wood to seal two planks together. This pictures shows a standard caulking wheel (much like a wheel used to insert screen into a screen door,) which will later be used to press spun cotton into the joints between the bottom planks of our boat.

In addition to cotton caulking, we plan to use the waterbox joint as well. We retrofited the standard caulking tool with Billy Bob's "get-r-dun" guide, (the piece of bronze bar attached haphazardly to the side.)  The guide helps position a 1/16" x 1/16" groove in the edge of the planks. After the groove is made, compressing the wood grain, the edge of the board is planed off. The compressed grain remains, and upon saturation, expands. It makes a continuous 1/16" bead, in theory. I hope those Japanese Joiners are right, because I'm in charge of the bottom of our boat not leaking like flour sifter. We are not using any "schmooey" between our planks, so its a handful of crochety Japanese dudes between me and the bottom.


Here is a close up of the guide. A bolt and some washers.


Diagram of Joint.
  1. Roll in groove with tool and then plane 1/16".
  2. Add water.
  3. Bead allegedly rises. Pray or swim as required. 

Plank in vise ready for groove.


Get-r-dun guide in action!


Beautiful, wonderful smelling Western red Cedar bottom planks.
Tomorrow we will assemble the bottom. I hope all the Japanese Joiners stay home.

Monday, December 12, 2011

Loose Ends and Boat Parts

Today we finished up loose ends on our beginning projects and watched a slide show on the Gundelow Skiff that we will be building. It is a traditional work boat of West Irish inland rivers. Think pickup truck of the water. More of a small toyota than a F-150. We saw some really low rent boats that were held together with drywall screws and roofing tar. Glad to see "Get'r'dun" boat building is alive and well in the old country.

Apparently we are going to have a whole lecture on various goos that go into boat building. For now, all we have to know is that there is "glue" and then there is "schmooey". Glue holds stuff together, and Schmooey "waterproofs" it. Or at least keeps some of the water out. Ever noticed that most small boats carry a small bucket? With a name like "schmooey" keeping my boat dry, I'll carry 2 buckets.


This is what you get for being Teacher's Pet. Chad is lofting our new boat. Sucker! I was so glad to stand outside at the sharpening station and flatten the bed of my old ratty Stanley planes today. It was 50 degrees and sunny, and so terrific not to be crawling around with colored pencils in my mouth and stepping on finish nails barefoot.


 This is a bright finished half model (Chad's) of the boat the whole class just finished lofting. It is carved with chisels, planes, and spokeshaves. If you don't gouge the crap out of it, you can finish it bright with varnish, or shellac.


This is what it looks like when you DO gouge the crap out of it. I was forced to resort to Bondo. It took me back to the days of the 280ZX fender i sculpted on my first car in high school. Except i couldn't figure out why it wouldn't dry. Must be cold, I thought. OR, you can actually add the hardener to the bondo. Dumbass. I painted mine white, with flat black bottom paint, and a red bootstripe. (By the way, I have know idea why more adolescents don't sniff Bondo.)


This is a shot of our transom laminated up from 3 pieces of something heavy, dense, and tropical. I'm not sure what woods were chosen, and why, but I'm sure it has something to do with availability (what the school has on hand), strength, and rot resistance. They don' skimp because of cost. "Boat Wood" is truly unbelievably expensive. I ran four 60+ dollar boards through a band saw today to rip them down to size for the bottom boards of the boat. Scary. Do the math. That's over $240 bucks for the BOTTOM of the boat. My pal screwed one up, so now it will have to be used for side planking. We needed 3/4" minimum, and he spaced out and the band saw wandered, leaving 5/8" for part of the board. We will have to mill that one down and get 1/2" for the sides.


The boat parts are being made on the fly while the lofting is still happening...yikes. This is a template made from doorskin that will be laid over the transom, traced, and mirrored. The large chunk of laminated tropical goodness will then be cut, (with a continuous rolling bevel) on the band saw. A bevel is when you angle the side of the board. A continuous bevel is when the whole edge of the board is beveled. A continuous, rolling bevel is when the angle constantly changes. Yeah. One person shoves the chunk through the saw, and the other slowly tilts the bed of the band saw to change the bevel. 

A continuous rolling Doofus is when you trash one out of four boards you cut running a flat board through a band saw to try to rip it down to 3/4". (To be fair, the one i actually cut myself was perfect. I only held the dumb end on the one we screwed up.)

Tomorrow we will lay out the stem and stern post out of a huge piece of black locust. Should be fun running that dude through the bandsaw. We will not attempt this before coffee, and we will try very, very hard not to cut any continuously rolling Doofuses.

Sunday, December 11, 2011

Priceless

My pal Matt (hereafter known as Fatty) came to visit this weekend to redline our 90% set of Construction Documents for the residence we are designing in Knoxville. For anyone who knows Fatty, you already have vivid images of a flatulent, lumbering, black U-boat leather clad goon playing air guitar amid a flurry of "EEEEP!!!"s. For those who don't, you are truly missing out. I suggest you look him up. If he's not tearing down the road in his silly souped up Porsche 914, he's probably pulled over, getting a ticket for doing 90 in a 25, or he might be terrifying first year architecture students with his piercing gaze and penchant for dystopia. At any rate, you should have seen his face upon first entering the Hobbit Hole.

We rolled up to the Marrowstone Island hippy commune, and stopped by Liz and Kayla's house to borrow a piece of foam for Fattstuff to sleep on, as well as some blankets to swaddle his ample tub. This should have been the first tip as to what he was getting into.

We parked, and strolled past the usual detritus: a 30' converted lifeboat (with a half finished deckhouse), a rusty "Little Cod" marine woodstove, chicken feed sacks full of offcuts, rigging, line, inflatable dinghies, et cetera. We rolled up to the Hole. I opened the door, and we stepped into the kitchen.

"Wow. This is pretty cozy."
"Yeah, here's the stove, mini fridge, real live running cold water. Here's the rest of the place..."

"Woooow. Ohhhh wooooow...holy shit. This is IT? You said it was small, but i thought...Oh wow. EEEEEEEEP."

Fatty's eyes looked like stove pipes when he stepped into the back 40 and surveyed the remainder of my domain, all 12' of it. At this point, having just gotten home from school, it was also about 40 degrees inside.

"So, what do you do when the fire runs out in the middle of the night?"
"Don't worry. You'll see."
"EEP!!! Eeeeeeeeeep."

Fatty was a good sport, and in the end, conceded that with running water, heat (albeit an interactive approach to heating), and the interweb, it was a pretty low maintenance yet civilized existence in the Great White North. We got our drawings done, and I made my Klondike Cakes for breakfast, securing my position as World's Greatest Yukon Flapjack Maker Ever.

I'm fairly certain that Fats will retaliate to this post by uploading the pictures he took of me laughing my ass off in my long underwear on facebook. I was changing for bed, and he noted that i looked like a 'tripartite polyester sausage'. It was good that i had just taken a leak, cause I'm sure I'd have wet myself.

Be sure to troll FB for a hot pic of me in my skivvies.
EEEEEEp.


Thursday, December 8, 2011

Lofting Death Throes

So. I've read countless books on boats over the years, and they all unanimously agree that transoms suck. Or at least that they are difficult to build correctly. Now i know why, as our last lofting task was the development of a curved transom. The transom is the flat part at the ass end of the boat that happens, in this case, to curve in 2 directions.

Our instructions were as follows:


I know. "What's the big deal?" You must be thinking. That's what i thought after Tim talked at us for 2 hours about the finer points of transom development. How hard could this be? I figured at least some of it sunk in. The results:


If you look closely you will see the following: white out, pencil,red ink, green ink, blue ink, orange pencil, blue pencil, yellow pencil, blood, hairs, (long and short, of various colors), eraser shavings, dirt, broom bristles, and splinters. We were not the best at keeping our drawing clean, or at organizing our lines. Neat and tidy draftsmanship hopefully comes later in the process of lofting. Our drawing looks like someone tried to murder a couple of preschoolers with #9 finish nails.

Lessons learned:
  • Choose your lofting partner wisely. My partner spent the last 2 weeks sick, hungover, tired, and otherwise disengaged. I meant to take a picture of him asleep in the middle of the loft floor at 3pm, but forgot the camera. He has mostly been engaged in a blossoming amorous affair, as evidenced by the presents left on his bike, and the blond girl working on my drawing during lunch. He's a great guy and i really like him; he just made a week's worth of decisions that impacted both of our educations negatively.
  • Mark your point, then nail to the side of it so the batten fairs through it. We did a little of both. Not so good. Pretty lumpy.
  • Don't buy the crappy #2 pencils from Target. I ran through a whole box of them. Literally. Like 20 pencils. They suck.
  • Make 6' triangles and get a 8' straightedge. Like, today.
  • Loft somewhere quiet. Or take ADD medicine. I wanted to kill people by the end of week 1. People love to talk just to hear their head rattle.
  • Make a t-shirt that says: "Personal bubble 3' Diameter, Minimum. Do not enter. 5' diameter if you are fu&*^%g annoying." Wear shirt every day. I couldn't tell you how many people stepped on me or my battens, swung their battens around and swatted me with them, or generally tried to stand in the middle of my drawing and bullshit with me while i was trying to concentrate on something complicated. Similar to the drafting exercise, except now instead of standing over my shoulder looking at my drawing, they could stand IN my freakin drawing and ask me how i like my hand plane. I paid 200 flippin dollars for it. I like it fine. What's that got to do with this 20' stick I'm trying to wrangle???
  • Research the boat you are going to loft. It helps to know what the hell you are drawing. I didn't. Now i do.
Though you might not believe it, given the volume and vehemence of this last rant, i really enjoyed lofting. I've been wanting to understand it for about 7 years, and now most of the mystery is solved. I'm sure I'll pick up tricks for years to come, but at least i have a great foundation to build upon.

Monday we actually get to start building a BOAT. Seriously. A 14' skiff of simple construction. Of course, we were told that the dudes who started the boat school, the Prothero brothers, could build one of these in a DAY. At age 10. Then i asked, "how long is it going to take us?"
Tim says, "About 2 weeks."
Nice.

But first...we have to loft it.


Monday, December 5, 2011

The Shelf, the Crater, and the Precipice

The Ice Cream Monster returned to her lair in Baltimore (leaving me with 5 extra pounds) after a completely successful visit to the rainy Pacific Northwest. Attached are random photos of our exploits, though they have little to do with boat school. I did, however, do some hull shape research in the inner harbor of Victoria, BC, Canada. We walked around and looked at old wooden fish boats and i collected ideas for a Fabulous live aboard boat construction project that may or may not ever happen. As these exploits often unfold, i obsessively research a subject (dutch barge hulls, or "tjalken", for instance) for a year or two, build some models, do some drawings, find 14 for sale for 450,000 euros in the Netherlands, and then buy something completely dissimilar, affordably, locally. Or decide im interested in goatherding. Or forget all about it, having learned what i wanted to learn.
Our time together was very laid back, excepting the stress of the continued lofting exercises. We had thanksgiving on the hippie commune, and a small thanksgiving gathering with Kayla, my personal boatschool photographer. We also "house sat" for a an incredibly generous boatschool pal. More like a free place to crash, shower excessively, and watch ALL the Lord of the Rings movies.

The biggest decisions that we faced while the Ice Cream Monster visited generally regarded who would sleep on the Shelf, and who would tackle the Precipice. We knew without a doubt, the Crater would be our fate in the end.

Our cramped stay in the Hobbit Hole was a great test run for living on a boat. We ironed out many small living details, including but not limited to: who is in charge of smoking the dirty boat yuppies out of the Hobbit Hole, who pees in a 13 gallon trashcan in the middle of the night because they have no interest in a frigid trot across the yard,  who sweeps up kindling crumbs obsessively, and who cooks the tastiest flapjacks in all the Yukon. (We also discovered who is still grouchy first thing in the morning, no matter how sweet, thoughtful, and generally awesome the Ice Cream Monster is.)

The most important discovery we made is that a twin bed is RIDICULOUS for two adults to sleep in.

One person had to sleep straddling the wooden ledge that runs the length of the back wall of the bed; the other had to sleep with either their knees, or their posterior hanging off the side of the bed, creating a wicked exposed ceiling updraft condition. By the end of the night, the glacial movement of our body weight would deposit us into a crater created in the center of the bed. It was impossible for both of us to lie on our backs simultaneously, and both of my arms were asleep more often than not. Between Sarah's hip ailment, and my sore lofting knees and ankles, hours of wiggling were not uncommon. I actually fell off of the precipice one night, though my catlike reflexes landed me on my feet, sort of.

I have been alone in the Hole for about 4 hours now, and already miss the Ice Cream Monster.
But, I just remembered the leftover ice cream sandwiches (rectilinear, compact, delicious) in the tiny, tiny freezer. Hmmm. I think i'll eat one, read a wooden boat magazine, stoke the fire, and then get a fabulous night's sleep.


houseboats in Victoria


 My kind of Jankyass houseboat. Plywood, crazy colors, listing to port. What's not to love?


Sarah feeding "Sammy" the harbor seal. Did you know seals have freakin fingernails??? I didn't. Crazy.


Floating Commander Wiggleberry


"Supreme #1" The modest fishboat captain.

Wednesday, November 30, 2011

Lofting Pictures

Here are some shots of the Bowl of Spaghetti.
This is an overall shop of the loft floor.


We stapled down sheets of doorskin and painted it white. We were then only allowed to walk on the loft floor in slippers, or in socks. Remember, we mark points with 6 penny finish nails. Finish nails sticking out of the floor like a pin cushion + Sock feet = ouch.


Here is my table of offsets, the keel of my boat, and the tips of my toes.


Tim's toes, and my benchmate dylan drawing a freakin tight curve at station 6 with a bundle batten. Battens are flexible sticks of straight grained wood. Bundle battens are 1/8" thick white oak battens bundled together and fastened at one end so they slide past each other as they bend. They are a natural spline.


Here is a closeup of the bundle batten in action. Amazing how tight of a curve you can draw with one of these things. If you're amazed by curvy wood, i suppose. I am easily enthused.

We finally got all of our major lines down today. Now all we have to do is develop about 50 straight on views of various pieces of the boat. Simple. I need to go back to 8th grade and actually pay attention to basic geometry, as its apparently the basic foundation to all lofting.

Yesterday i was convinced that it was voodoo, plain and simple. I was pretty sure i could benefit from carrying a chicken foot in my left pocket, and throwing a pinch of salt over my left shoulder before i struck a line. I also considered only lofting on the north side of the shop at midnight of the full moon. But, today i drew some righteous tumblehome in my transom by developing an extra waterline between 2a and 3a, and crossing it with butt 4. then i faired the errors in my LWL with the help of butt 4 and developed my rabbet at the stem with the help of diagonals A,B, and C.

Wow.
Maybe i'm getting it.


Sunday, November 27, 2011

Winter life in the Hobbit Hole

The following pictures describe winter life in the "Hobbit Hole". The Hobbit Hole is actually the old deckhouse of the rehabilitated schooner Adventuress. She is a B.B. Crowninshield designed schooner built in 1913. http://en.wikipedia.org/wiki/Adventuress_(schooner)
She operates in a shipboard educational capacity here in Puget Sound.

Cap'n Wayne-o, my landlord, was an officer aboard, (or maybe Captain; i'm not sure), and couldn't bear to see the old deckhouse destroyed, so he and a former boatschool student built a small cord-wood base and added the deckhouse lid. They later built a small 6'x6' kitchen addition. The Port Hadlock Marina unwittingly provides shower facilities to Hobbit Hole residents. The showers there are leagues above my shower in knoxville in both capacity, and quality.


The inimitable Sarah Taylor eating yogurt covered pretzels. I lost ten pounds when i moved out of the Ice Cream Monster's lair. I gained it back when the Ice Cream Monster brought cookies and preztels with her to WA. Why not ice cream, you ask? Cause my dorm fridge has a freezer the size of a pack of cards.


Too much Jack London. Now i know why the top of the stove is flat. The "white top" grandpa dishes work nicely for keeping my flapjacks warm while i'm cooking for the other Klondike '49ers.


ST also brought the "Chicken Hat" She is crazy. She said she was not sure i would wear it. I asked her if she had ever met me before. Of course i'm going to rock the chicken hat!

Pardon the mixed metaphors, but Hobbit Holes, Schooners, and Jack London Klondike flapjacks make for a pretty romantic life here in the Pacific Northwest.

Friday, November 25, 2011

Lofting Demystified

Lofting is the process of drawing a boat full size on the loft floor in order to create templates from the lines you lay down. These templates will then be used to cut out pieces of the boat. A table of offsets provides the dimensions required to measure up from a baseline, or across from the center line to plot the necessary point. 


Think of it this way: take an oblong bowl of spaghetti, cut it lengthwise, and use a faded, splotchy xerox of an old excel spreadsheet to plot each point that your knife touched. Put some nails in the floor at the points the splotchy graph indicated, bend a 20' long stick around it, and draw a curve. Then label all these noodles with strange, esoteric names, like "buttocks" and "forward perpendicular" and you pretty much have it. At the end of the day, when you can't stand up any more because your knees gave out, or you bought the local drug store clean out of white-out (cause erasing on white painted door skin is a bitch,)you look at your lines, and viola! It looks like a boat! No. It actually looks like a bowl of spaghetti with white-out stripes.


I have drawn rectilinear buildings for years, by hand, and in autocad. This business is just crazy. The concepts are the same, but keeping all the noodles straight in my brain is tough. It doesn't help that you can't see both ends of a noodle from one spot. It also doesn't help that you are dealing with a sixteenth of an inch tolerance over sixteen feet--especially when you are using a janky-ass plywood square some dude cut on a table saw and didn't bother to tell you was and eighth out in four feet. (Probably why i had so many white stripes in the first hour. I hate using crappy tools. If i ever loft a boat again, I'll have an 8' triangle milled at a steel fab shop.)


So far i have not done much in the boat drawing department to give boat building enthusiasts any faith in architects. I keep telling people that just because i have worked in architecture firms for years doesn't mean I'm GOOD at it. I keep telling myself its not about the drawing; its about learning how to draw the drawing. 


Tim said, "Oh, you don't EVER want to build the first boat you loft." Someone asked why.
"Don't worry. You'll see why." 


Maybe Monday will be be better, and I'll unravel the mystery of the noodle bowl. 

Thursday, November 24, 2011

Beginning Projects

Chief instructor Tim Lee mentioned yesterday morning that we would have some time after our 3 weeks of lofting to finish up our beginning projects, but that it was important for all of us to loft together. (Lofting is the process of drawing a boat full size on the floor to later pick up templates for cutting actual boat parts. More on this later.) In the process of learning the basics, I actually forgot that i came here to build boats.

We have spent the first month and a half learning to use hand tools: Japanese pull-saws, or "Dozuki" saws, chisels, planes, draw knives, flat and round bottomed spokeshaves, files, Japanese water stones for sharpening, grinders, and an assortment of measuring and marking tools.

In the process of learning these basic, but extremely difficult hand skills, we have produced a series of janky-ass joinery: half-laps, mitered half laps, bridle joints, carlin joints, and the mystical dovetail. (The good news with all this butchered pine is that i burn all of these useless joints in my wood stove at night.)

We then used these skills to make our own mallets (for driving chisels) as well as our own toolboxes. We were also being lectured daily on power tools, such as routers, table saws, lathes, planers, jointers, band saws, and various cutting jigs for all these machines. Upon demonstrating our prowess with these machines, (by holding up both hands with all 10 fingers upon completion of each cut) we were "checked out" on the power tools and given free reign to get on with our projects, or dismember ourselves as we saw fit.

I went to the local exotic lumber dealer/sawmill and bought a cant of cherry, re-sawed it, planed it to 3/8" and built a swanky tray for the top of my toolbox. I then realized that there was not enough "meat" at the top of the handle, and that it would probably break at some point in the near future. Tim then mentioned that i could use brass strapping to reinforce it. I asked him if this wouldn't be a bit masturbatory. He said "of course, just don't do it in public." The attached pictures say it all. No one prepared me for the nearly spiritual fulfillment that i experienced when loading my own hand dovetailed toolbox down with my beautiful, ridiculously expensive hand tools. I think some of my classmates want to shiv me in the alley between the wood shops; the brass might have been a bit much.

Another instructor wandered by while i was staring at it. For like, 5 minutes. He said, "What are you looking at?" I just turned and looked at him blankly.
"I cant believe i made this."
"yeah. Its pretty cool. I remember the first time i made my first beautiful boat. There not all beautiful, but man, you'll never forget the first beautiful one."

Oh yeah. I forgot i was here to build boats. But first, we have to learn to draw them.


Sunday, November 20, 2011

The Koshka's Farewell

How this all started

Several years ago, i decided it would be fun to learn to sail. I lived in Asheville, NC, sailing capital of the world, so it seemed like it would be simple to find a suitable body of water and a like minded group of folks with the same nautical interests. I ended up in a cooling pond for a coal fired power plant cowering on the bow of a skinny dude's laser in a pair of borrowed swim trunks. In March. This harrowing experience prepared me only nominally for the wet, cold privations of my sailing future. I realized immediately that i HAD to have a boat of any color or stripe, and that i had to learn to sail.

I had the great misfortune of mentioning this experience to coworkers at Mathews Architecture. Rich, the bearded Wooden Boat Magazine hoarder pipes up and says, "You know you can build a boat out of plywood and epoxy, right?" In two weeks time, i received my plans in the mail, bought plywood, began design revisions, and started the slow and lethal process of poisoning Robin with a pile of toxic trash in the basement/garage. The wafting fumes of paint thinner, bondo, varnish, and epoxy silently crept under the midget door between the garage and basement and nearly did us in. In 6 months time, with the fine carpentry skills of Capn Crockett, we had an attractive, seaworthy dinghy that did not disgrace the Flint Street Boat Shop. Now i had to learn to sail it.

Having 43 minutes sailing experience between the two of us, Crockett and i launched her with family and friends at Lake Julian in a near gale on April Fools day. We piled into the Koshka (Russian for "Cat") and cast off. We crept out of the cove in a jumble of skinny legs and cheap nylon line, climbing over each other and the exquisitely crafted, gossamer thin, yet over-long cherry tiller. Cherry is the soft hardwood. We scooted round the lee shore, and the sail filled. I somehow missed in the plans that the tiller had to pivot. Steering was limited, the gale screamed at full tilt, and we swamped 50' from the launch site. Then we swam, bailed, laughed, and broke the hearty tiller off in our second attempt. Crockett climbed onto the pitching foredeck and furled the sail and we paddled like hell to get back. We considered it a successful maiden voyage, and i went home to build another tiller. I think i ended up splicing the one i had, cause spring had arrived, and i had sailing to do.

I have been truly obsessed with boats since those days. I finally realized that i needed to spend more time being in, on, around, under, or at least near them. The end goal with boat school is to work in a shipboard or boat building educational situation with kids. I love to share the things that give me so much joy, like paint thinner, varnish, bondo, epoxy and turpentine. (Ask Robin how much i love to share.) Or maybe if I'm going to be cold and wet, i'd like for other folks to be around. Either way, I'm in WA for a year to learn how this curvy, mystical mojo is really done.

Saturday, November 19, 2011

First Blog Post Ever

Monumental occasion. First post. I cant even upload a photo to facebook. What am i trying to pull here?
This blog is an attempt to record my year at boat building school in Port Hadlock, WA. Think of it as a digital fireside chat, without the polio, or maybe the firebombing of London. Oh well. Paltry and rather anticlimactic first post i realize. I'll actually talk about boats tomorrow.